Starting Seeds Indoors: Timing and Techniques for Minnesota's Short Growing Season
-
 Petal Thorne
- 7 Min To Read
- 3/29/2024
Living in Minnesota, we're well-acquainted with the unique challenges that come with our notably short, yet undeniably beautiful growing season. The window for cultivating a thriving garden is brief, pushing us to find innovative ways to maximize our time and the variety of flora we can grow. One effective strategy that has become increasingly popular among local gardening enthusiasts is starting seeds indoors. This approach not only extends the gardening calendar but also opens up a world of possibilities for growing a diverse array of plants that might otherwise struggle in our climate.
Whether you're fantasizing about creating an oasis of colorful flower beds that become the envy of your neighborhood, or you're aiming to cultivate a vegetable garden that yields an abundance of fresh produce, this guide is crafted for you. We'll delve into the essential steps for starting your seeds indoors, from selecting the right soil and containers to mastering the art of temperature and lighting control. Additionally, we'll share savvy techniques that have been honed by experienced Minnesota gardeners, designed to enhance your seed starting success and ensure that your plants are robust and ready to thrive once they make the transition outdoors.
Embarking on your indoor seed starting journey can seem daunting at first, but with the right knowledge and tools at your disposal, it can become an incredibly rewarding part of your gardening experience. So, let's get started on this exciting adventure together, ensuring that when the Minnesota growing season finally arrives, your garden is poised to flourish like never before.
Before diving into the intricacies of starting seeds indoors, it's imperative to grasp the nuances of Minnesota's growing season. The state is known for its challenging climate, with winters that can stretch their icy fingers well into what should be spring. Typically, our frost-free period, a critical window for gardeners, stretches from late May to early September. This timeline presents a relatively short window for outdoor gardening, squeezing the growing season to just about four months.
This brief season means that for Minnesotans, early indoor seed starting is not merely an option—it's a necessity for ensuring a fruitful harvest, particularly for plants that require longer to reach maturity. Vegetables like tomatoes, peppers, and eggplants, along with some varieties of flowers that have longer maturation periods, need a head start indoors to fully develop and produce yields before the first frost signals the end of the growing season.
Understanding this timing is crucial for planning your garden. By starting seeds indoors, you can extend the growing period for your plants beyond what the local climate dictates. This approach allows gardeners to not only enjoy a wider variety of plants but also to maximize their gardening efforts, ensuring that even with Minnesota's short growing season, the results can be both bountiful and rewarding.
Moreover, this early start indoors can be a delightful prelude to the outdoor gardening season, offering a sense of greenery and growth even while the outside landscape may still be in the grip of winter. It's a way to get a jump on the season, nurture seedlings in a controlled environment, and prepare them for the eventual transition to the great outdoors. With the right techniques and timing, even gardeners in Minnesota can enjoy a vibrant and productive garden.
When embarking on the journey of starting seeds indoors, especially in regions with shorter growing seasons like Minnesota, the first and perhaps most crucial step is choosing the right seeds. This decision can significantly impact the success of your gardening endeavors. To ensure a thriving garden, it is essential to select seeds that are not only suitable for indoor starting but also well-suited to our unique climate conditions.
Minnesota falls mostly within USDA Hardiness Zones 3-4, meaning our growing season is relatively short and our winters can be quite harsh. Therefore, it's important to choose plant varieties that are known to thrive in these specific zones. This might include vegetables that have a shorter time to maturity, flowers that can withstand a slightly cooler climate, or native plants that are naturally adapted to our environment.
Considering Minnesota's native species is also a smart move for the eco-conscious gardener. Native plants tend to be more resilient and require less maintenance once established. They are adapted to our local climate and soil conditions, making them a sustainable choice for your garden. For example, the Black-eyed Susan (Rudbeckia hirta) is a native flower that adds vibrant color to your garden and attracts pollinators, while also being drought-tolerant. On the vegetable side, kale (Brassica oleracea) is a hardy leafy green that can tolerate cooler temperatures and even improve in flavor after a frost, making it an excellent choice for Minnesota gardens.
It's also important to remember that not all plants are suitable for starting indoors. While starting seeds indoors can give you a head start on the growing season, some plants prefer or even require direct sowing into the garden. This is often the case with root vegetables like carrots and beets, or large-seeded plants like beans and peas, which do not transplant well. To avoid disappointment, always read the seed packets carefully before making your selections. These packets provide a wealth of information, including whether the plant prefers to be started indoors or sown directly, along with other critical details like planting depth, spacing, and light requirements.
In summary, the key to a successful garden, especially in areas with challenging climates like Minnesota, starts with selecting the right seeds. By choosing varieties that are suited to our hardiness zones, considering native species, and paying close attention to the specific needs of each plant, you can create a beautiful and productive garden that brings joy throughout the growing season.
Timing your seed starting correctly is absolutely crucial when it comes to achieving a successful and bountiful garden, especially in regions like Minnesota where the growing season can be remarkably short. As a general guideline, the majority of seeds benefit from being started indoors about 6 to 8 weeks prior to the last expected frost date. In the context of Minnesota's climate, this typically translates to preparing and setting up your indoor garden anywhere from late March to early April. This timeframe gives your seedlings a head start, ensuring they are strong enough to be transplanted outdoors once the threat of frost has passed.
However, it's important to remember that these are just general guidelines. The optimal timing for starting seeds indoors can vary significantly depending on the specific type of plant you're looking to grow. To ensure the best possible outcome, it's essential to refer to the instructions provided on the seed packet. These instructions are tailored to the individual needs of each plant species and will often offer more precise recommendations for planting times, depth, and care. By following these specific guidelines, you can maximize your chances of cultivating a thriving garden that's perfectly synchronized with Minnesota's unique growing season.
Additionally, considering Minnesota's unpredictable spring weather, keeping a close eye on local frost dates and being prepared to adjust your planting schedule accordingly is wise. Sometimes, the last frost may occur later than expected, necessitating a bit of flexibility with your seed starting timeline. By staying informed and adaptable, you can ensure that your seedlings are not exposed to potentially damaging cold temperatures once they are moved outdoors.
In summary, while the general rule of thumb is to start most seeds 6-8 weeks before the last expected frost date in Minnesota, paying close attention to the specific needs of each plant type and remaining vigilant about local weather conditions will greatly enhance your gardening success. Happy planting!
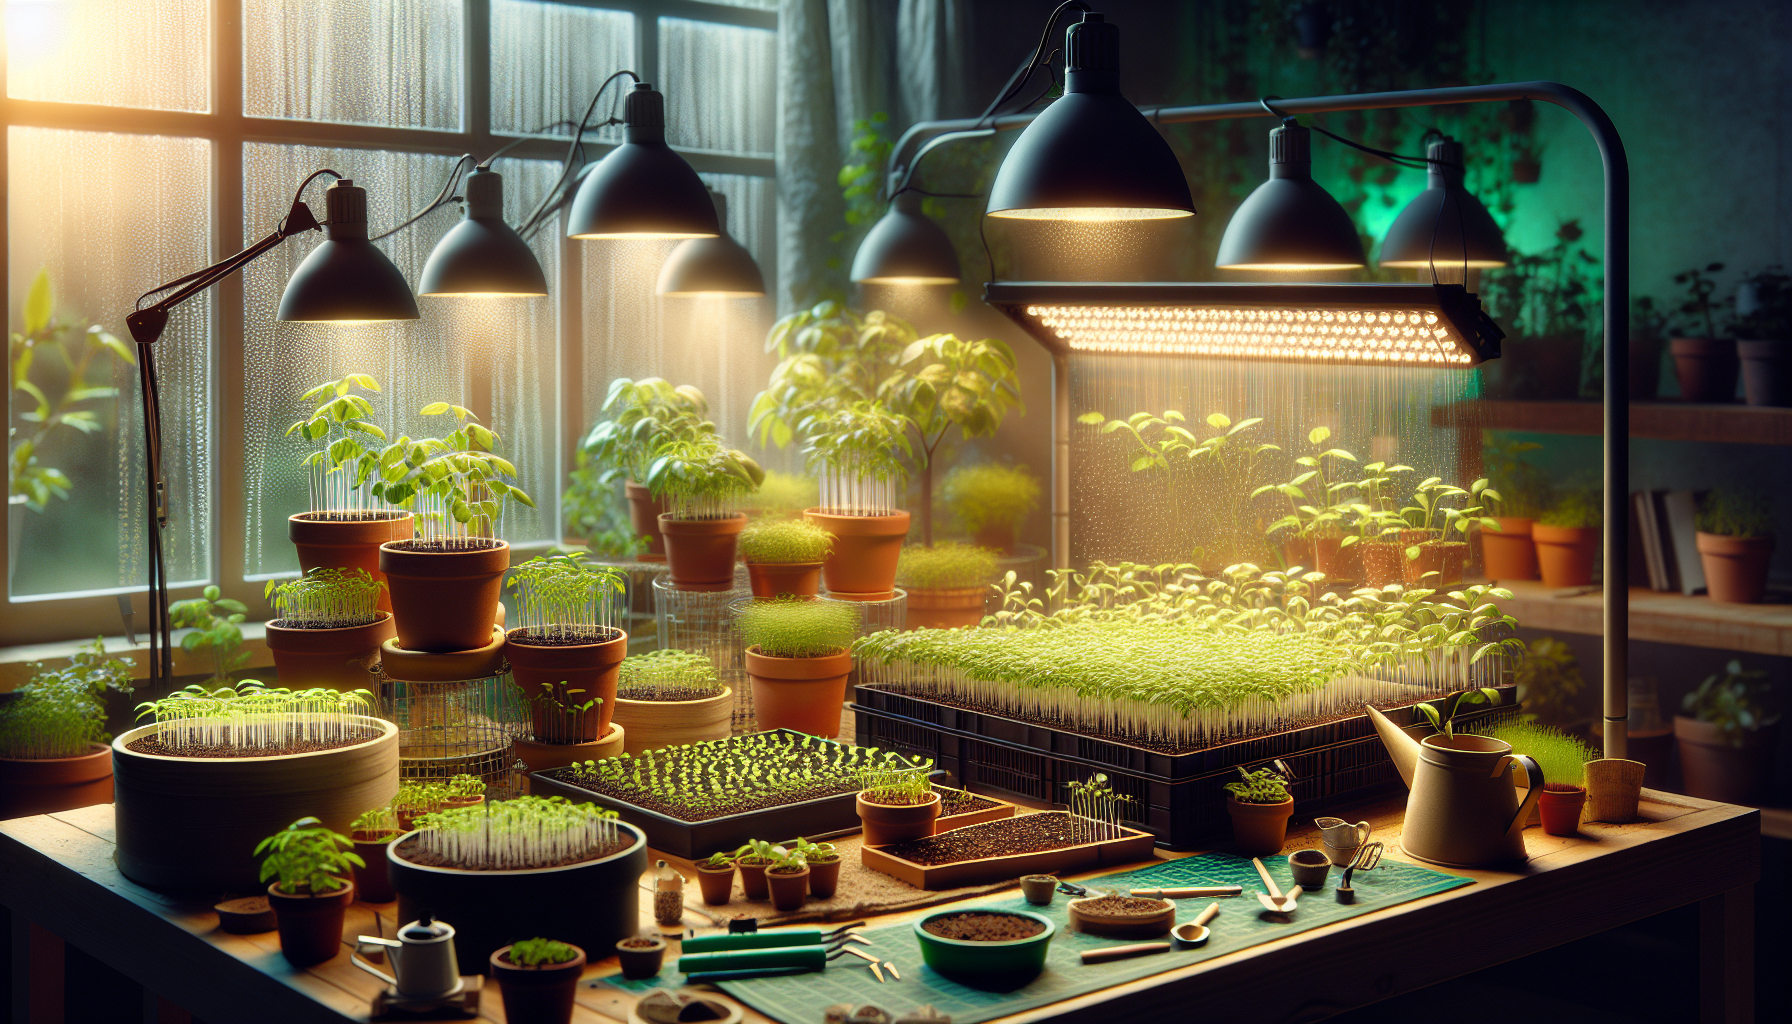
Creating the perfect environment for your seeds to sprout and thrive is the first step towards a successful gardening season, especially in Minnesota where the growing season is notably short. A dedicated seed starting station will not only provide your seeds with the conditions they need to grow but also make the entire process more organized and enjoyable for you. Here's how you can set up an efficient and effective seed starting station:
- A Warm, Well-lit Spot: Seeds need plenty of light and warmth to germinate. A south-facing window can be an ideal location because it allows for the maximum amount of natural sunlight throughout the day. However, during the early spring, when the days are still short, you might not have enough natural light. In that case, a warm spot with stable temperature, away from drafts, is crucial.
- Grow Lights: If natural light is insufficient, which is often the case in the early Minnesota spring, grow lights can be a game-changer. They can provide your seeds with the consistent, intense light they need to grow strong and healthy. Look for full-spectrum grow lights, which mimic natural sunlight, and make sure to adjust the height as your plants grow to avoid stretching or scorching.
- Seed Starting Mix: The right soil is vital for seed germination. A seed starting mix is lighter and more sterile than regular potting soil, ensuring good moisture retention and air circulation. This type of mix helps prevent diseases that can thwart young seedlings. Moisten the mix slightly before planting to provide the ideal environment for your seeds to begin their journey.
- Containers with Drainage Holes: Good drainage is essential to prevent waterlogging and ensure your seeds have access to the right amount of moisture. You can use a variety of containers, such as peat pots, plastic trays, or even repurposed household items, as long as they have drainage holes. Remember, the size of the container should accommodate the growth of the seedlings until they're ready to be transplanted outdoors.
- A Watering Can with a Gentle Spray: Seedlings are delicate and can easily be damaged by a heavy flow of water. A watering can with a gentle spray or a misting bottle allows you to water your seeds and seedlings lightly without disturbing the soil or damaging the plants. Consistent moisture is key, but be careful not to overwater.
- Labels: Keeping track of what you've planted and when is essential, especially when you're starting multiple varieties of plants. Use labels or markers to note the plant type and the date of planting. This will help you monitor their progress and remember when it's time to transplant them into your garden.
By carefully setting up your seed starting station with these components, you'll create an optimal environment for your seeds to grow. This early investment of time and resources can lead to a bountiful harvest, making it all worthwhile when you enjoy the fruits (and vegetables) of your labor.
Beginning your gardening journey by starting seeds indoors can be an exciting and rewarding endeavor, especially in regions like Minnesota where the growing season is notably short. The process requires some preparation and attention to detail, but with the right approach, you can cultivate a thriving garden that starts right inside your home. Here's how to get started:
First, select suitable containers for your seeds. These can range from purchased seed trays and peat pots to DIY solutions like egg cartons or yogurt cups with drainage holes poked at the bottom. The key is ensuring adequate drainage to prevent waterlogging, which could harm the seedlings.
Next, fill your chosen containers with a high-quality seed starting mix. This mix is lighter and more sterile than regular garden soil, providing an optimal environment for young seeds to germinate and grow. Avoid using garden soil directly, as it can contain pathogens that might harm your delicate seedlings.
Once your containers are filled, it's time to moisten the soil. Use a spray bottle to gently water the mix, ensuring it's damp but not waterlogged. A properly moistened seed starting mix provides the necessary hydration for seeds to begin the germination process without the risk of mold or fungal issues.
Now, you're ready to sow your seeds. Carefully read the seed packet's instructions, as they will provide crucial information on how deep to plant the seeds. Some seeds, such as lettuce and petunias, require light to germinate and should be gently pressed onto the surface of the soil without covering them. Others, like tomatoes and peppers, need to be buried a specific depth beneath the soil to germinate properly. Use a pencil or a small stick to create holes at the appropriate depth for these seeds, then cover them lightly with the seed starting mix.
After sowing your seeds, it's important to create a humid and warm environment to encourage germination. Covering the containers with plastic wrap or a clear plastic dome can achieve this. Ensure the cover is not too tight – a little air circulation is beneficial. This makeshift greenhouse traps moisture and warmth, simulating the ideal conditions for seed germination.
Place your containers in a warm spot with plenty of indirect light. Some seeds have specific temperature requirements for germination, so consider using a heat mat if your home is on the cooler side. Remember, the goal is to mimic the warm, moist soil of springtime.
By following these steps, you'll create the perfect environment for your seeds to start their journey. With patience and care, you'll soon see the first signs of life as your seeds begin to germinate, marking the start of an exciting growing season ahead.
After the exciting moment when your seeds finally sprout, it's time to shift gears in your care routine to ensure your seedlings develop into strong, healthy plants. The first step in this new phase is to remove any cover you might have used to create a greenhouse effect. This is crucial because seedlings need direct exposure to light to continue growing properly.
Speaking of light, it's essential to provide your young plants with ample amounts of it. In Minnesota's climate, relying solely on natural light during the early spring can be a challenge due to shorter daylight hours. Consider supplementing with grow lights placed a few inches above the seedlings for 14-16 hours a day. This will mimic the long days of summer and encourage robust growth. Remember to rotate your containers every few days. This prevents your seedlings from growing lopsided as they stretch towards the light source, ensuring they develop strong stems and a healthy posture.
Watering your seedlings properly is another critical aspect of their care. Use a gentle spray to moisten the soil, taking care not to dislodge or harm the delicate young plants. The goal is to keep the soil consistently moist but never waterlogged, as too much water can lead to fungal diseases such as damping off. A good rule of thumb is to water when the surface of the soil starts to look dry, but before the seedlings show signs of stress.
As your seedlings grow, you may notice that they start to compete for space, light, and nutrients. This is a sign that it's time to thin them out. Thinning involves removing some plants to give the remaining ones enough space to develop fully. It might feel counterintuitive to pull out plants you've nurtured from seeds, but it's a necessary step to avoid overcrowding and ensure the health of your garden. Use a pair of scissors to snip the seedlings at the soil level, choosing to remove the weakest ones and leaving the strongest to continue growing.
By following these steps—removing the cover after germination, providing plenty of light, rotating the containers, watering correctly, and thinning overcrowded seedlings—you'll be well on your way to raising healthy plants ready for transplanting into your Minnesota garden. Remember, the care you give your seedlings in these early stages sets the foundation for their future growth and productivity.
Before you even think about moving your tender seedlings to the great outdoors, they need a gentle introduction to their new environment. This critical phase is known as "hardening off," and it's all about helping your plants adjust to the sunlight, wind, and temperature fluctuations they'll face outside the cozy confines of your home or greenhouse. Without this step, your plants might suffer from transplant shock, which can stunt growth or even lead to their demise.
The hardening off process should start about a week before you plan to transplant your seedlings outdoors. On the first day, take your plants outside and place them in a sheltered, partially shaded spot. This could be under a tree, on a porch, or even under a makeshift tent of garden fabric. The goal is to expose them to the elements gradually. Let them bask in the great outdoors for about an hour, then bring them back inside.
Each day, increase their outdoor time by an hour or two, and gradually introduce them to more direct sunlight. Be mindful of the weather; if it’s particularly windy or the sun is too intense, it might be best to provide some protection or cut the outdoor session short. Remember, the goal is to acclimatize your plants, not to stress them unnecessarily.
After a week of this gradual exposure, your plants should be ready to make the transition to their permanent spots in your garden. However, keep an eye on the forecast. If a sudden cold snap or extreme weather is expected, it might be wise to delay transplanting or protect your plants with cloches or row covers.
By taking the time to harden off your seedlings properly, you're giving them the best possible start in life. This process strengthens their cell structure and reduces the risk of shock, ensuring that they can thrive and grow into strong, productive plants. So, although it might require a bit of patience and effort, the rewards of a bountiful garden are well worth it.
After the crucial process of hardening off your seedlings, which gradually acclimates them to the outdoor conditions, you've reached an exciting milestone in your gardening journey: it's time to transplant them into your garden. This step is pivotal for your plants, as it marks the beginning of their growth in their final outdoor home. To ensure a smooth transition and minimize stress on your plants, timing and technique are key.
Ideally, choose a cloudy day or late afternoon for transplanting. The reduced sunlight during these times helps prevent the plants from experiencing too much stress or shock from the change in environment. Overcast skies or the gentler rays of the sun in the late afternoon are less harsh on your delicate seedlings, giving them a better chance to adapt to their new surroundings without the added strain of bright, direct sunlight.
When you're ready to begin, approach each seedling with care. Start by gently removing it from its current container. This step requires a delicate touch, as the roots of your seedlings are tender and can be easily damaged. Hold the base of the stem lightly and tip the container on its side, tapping or squeezing its sides to encourage the root ball to loosen. If the plant doesn't easily slide out, you may need to carefully run a knife or a small gardening tool around the inside edge of the container to help free the seedling.
Once removed, inspect the root ball. If the roots are densely coiled around the exterior, gently tease them apart to encourage outward growth. However, be careful not to damage the roots in the process. This step is crucial for preventing the roots from continuing to grow in circles, which can stunt the plant's growth.
Now, it's time to place your seedling in its new home. Ensure that the garden bed is well-prepared, with loose, fertile soil that's been amended as needed based on the specific requirements of your plants. Make a hole in the soil large enough to accommodate the root ball, setting each plant at the same depth it was growing in its container. This familiarity helps the plant adjust more easily. Then, backfill the hole gently but firmly to secure the plant in place, eliminating any large air pockets that could dry out the roots.
Immediately after planting, water each seedling thoroughly. This initial watering is critical as it helps settle the soil around the roots, removing any remaining air pockets, and ensures that your plants have the moisture they need to start adjusting to their new environment. Going forward, keep a close eye on your newly transplanted seedlings, especially over the first few weeks, to ensure they are getting the water and care they need to thrive.
Transplanting is a significant step in the life of your garden plants, marking the beginning of their journey to maturity. With careful timing and gentle handling, you can help ensure this transition is as smooth and stress-free as possible, setting the stage for a successful growing season.
Embarking on the journey of starting seeds indoors is not just a gardening task; it's a labor of love that opens up a world of possibilities for gardeners in Minnesota, where the growing season is notoriously brief. The process, while it requires patience, diligence, and a bit of learning, is incredibly rewarding. There's a unique sense of achievement in knowing that the vibrant blooms and bountiful harvests in your garden began as tiny seeds in your care.
As you refine your techniques and become more attuned to the needs of your seedlings, you'll find that this early start can significantly extend the variety and duration of your gardening endeavors. From the delicate herbs that enhance your culinary creations to the robust vegetables that become the centerpiece of your summer meals, and the dazzling flowers that adorn your space, each plant tells a story of your dedication and love for gardening.
Remember, the key to success lies in the details: understanding the specific needs of each type of seed, providing the right conditions for germination, and nurturing your young plants until they're ready to transition outdoors. It's a journey of discovery, filled with moments of wonder and learning. As each seed sprouts and grows, you're not just cultivating plants; you're cultivating a deeper connection with nature, right from the comfort of your own home.
So, to all the gardeners in Minnesota and beyond, embarking on this indoor seed starting adventure, embrace the process with enthusiasm and curiosity. The time and effort you invest during these early stages lay the foundation for a lush, thriving garden that reflects your passion and perseverance. Happy gardening, and here's to a season filled with the colors, textures, and flavors you've nurtured from the very start.