Garden-to-Table: Preserving Your Minnesota Harvest for Winter Feasts
-
 Petal Thorne
- 8 Min To Read
- 4/7/2024
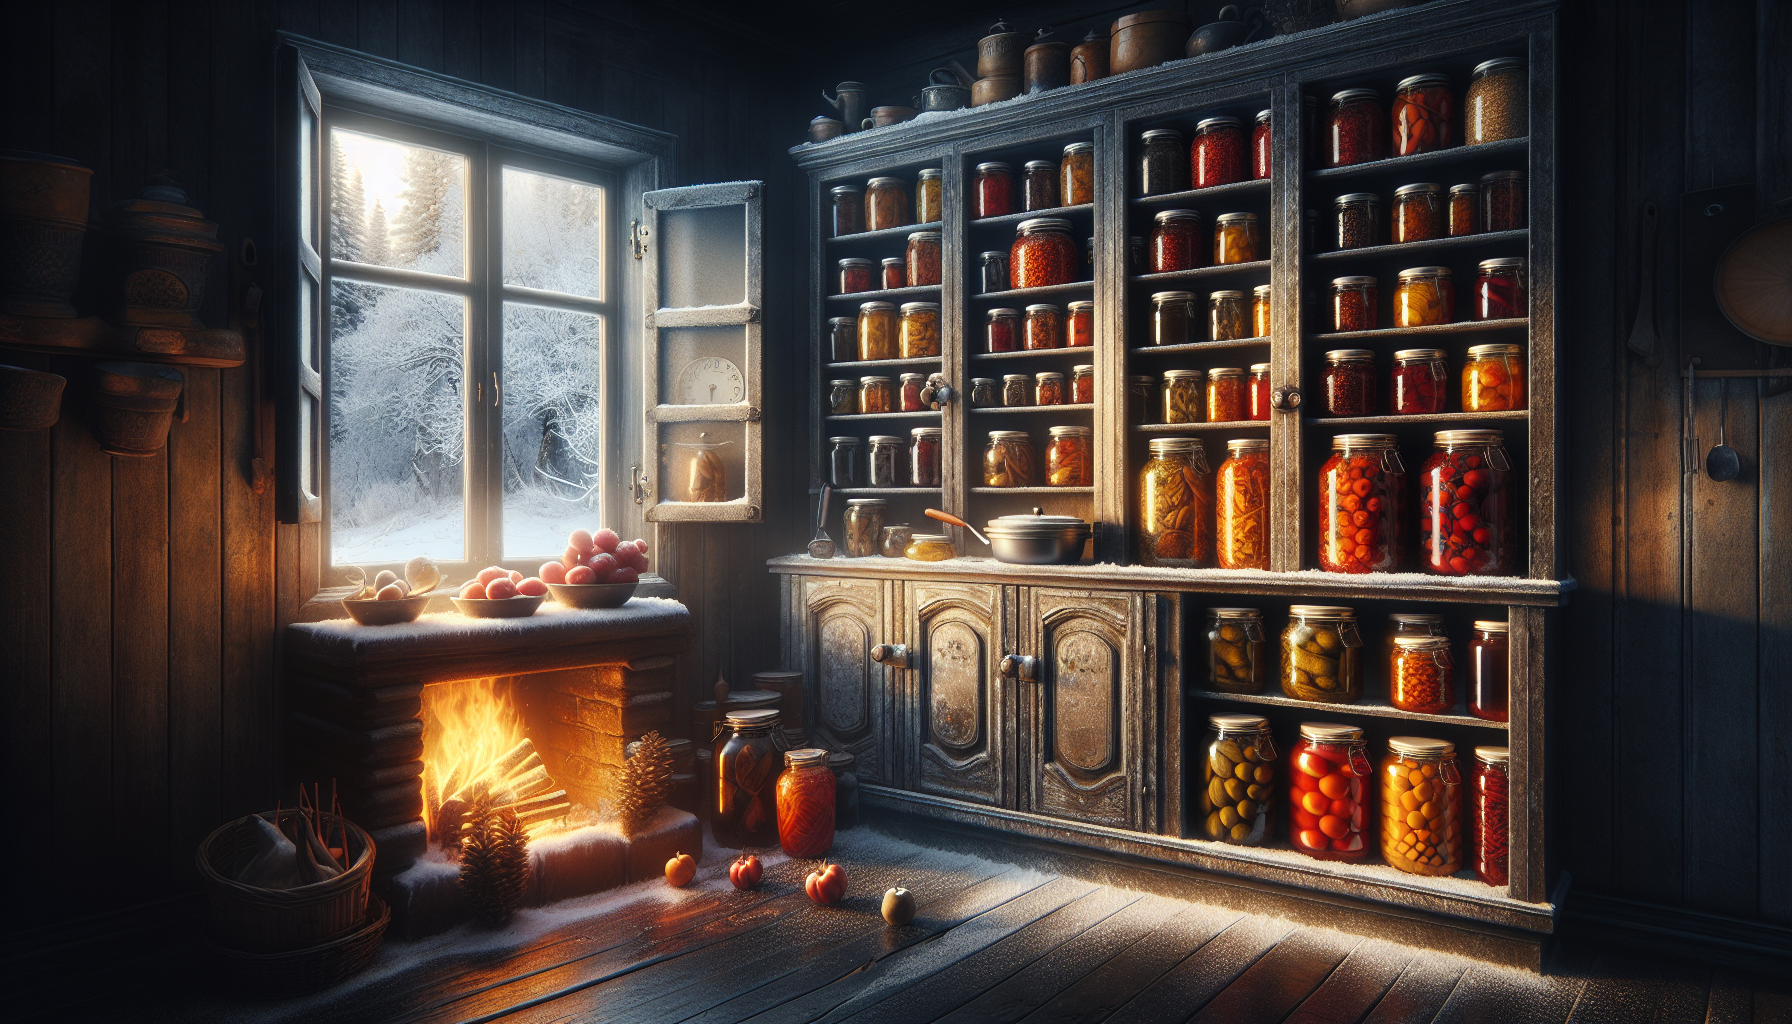
As the vibrant Minnesota summer transitions into the crisp hues of autumn, our gardens begin to offer their final bounties. It's a time when the fruits of our labor can be harvested in abundance, but also a time to ponder on how to make these treasures last. Preserving your harvest is not just a means to extend the joy of gardening into the colder months; it's a tradition steeped in practicality and flavor, allowing us to savor the essence of summer even on the frostiest winter days.
Understanding the basics of home preservation opens up a world of possibilities for any gardener. Whether you're canning tomatoes, freezing green beans, drying herbs, or storing potatoes in a root cellar, each method has its unique benefits and satisfies the longing for summer flavors during the snow-draped months. Moreover, embracing these practices can reduce food waste and offer more control over what you eat, knowing it's free of the additives found in commercially preserved goods.
For those new to gardening, starting your adventure with some essential tips for starting your Minnesota garden can provide a solid foundation for a fruitful season. As your garden matures, employing rainwater harvesting tips and understanding the importance of attracting pollinators can significantly enhance your yield, making the preservation process even more rewarding.
In this article, we'll explore various methods to preserve your harvest, ensuring you can enjoy the fruits of your labor throughout the year. From the simple joy of opening a jar of summer preserves to the satisfaction of preparing a meal with ingredients you've grown and stored yourself, let's embark on this journey to extend the bounty of your Minnesota garden.
Understanding the Basics of Home Preservation
At the heart of enjoying your Minnesota garden's bounty well into the winter months lies the art and science of home preservation. Grasping the basics of this essential skill can transform your approach to gardening, making every harvest more rewarding. Home preservation involves several methods, each suited to different types of produce, and understanding these can help you choose the best method for your garden's yield.
Canning is a popular method that involves processing food in airtight containers to extend its shelf life. This technique is ideal for fruits, vegetables, and even some types of meat. Freezing, another straightforward preservation method, locks in freshness and is perfect for fruits, vegetables, and herbs. Drying, on the other hand, removes moisture from food, concentrating flavor and making it ideal for herbs and some fruits. Lastly, root cellaring leverages cool, dark, and humid conditions to naturally preserve root vegetables, cabbages, and some fruits.
Each method has its advantages and nuances. For instance, efficient watering techniques during the growing season can enhance the flavor and preservation quality of fruits and vegetables. Similarly, understanding the ripening process is crucial for planning your harvest with preservation in mind. The type of preservation method you choose can also depend on your garden's yield, which can be influenced by factors such as attracting pollinators to boost production and employing companion planting strategies for healthier plants.
Understanding the basics of home preservation not only allows you to enjoy your garden's produce year-round but also contributes to a more sustainable lifestyle by reducing food waste. Whether you're a seasoned gardener or new to the green-thumbed life, diving into the world of home preservation opens up a new avenue for culinary creativity and self-sufficiency.
Canning Your Vegetables: A Step-by-Step Guide
Preserving the summer's harvest through canning is a rewarding way to enjoy your garden's produce all year round. This guide will walk you through the basic steps of canning vegetables, ensuring your pantry is stocked with wholesome, homegrown goodness come winter.
Firstly, it's essential to select fresh, ripe vegetables from your garden. The quality of your canned goods heavily relies on the freshness of your produce, so consider planning your harvest with canning in mind. Wash your vegetables thoroughly to remove any dirt or debris.
The next step is to prepare your canning jars and lids. Sterilize them by boiling in water for at least 10 minutes; this step is crucial for preventing contamination and ensuring the safety of your canned goods. Meanwhile, prepare your vegetables by cutting them into uniform sizes to ensure even cooking.
Depending on the type of vegetable, you may need to blanch them before canning. Blanching — briefly boiling and then plunging into ice water — helps preserve color, texture, and nutritional value. After blanching, pack your vegetables into the sterilized jars, leaving enough headspace as recommended for the specific vegetable you're canning.
Now, prepare your pickling solution or canning liquid. This could be as simple as salted water or something more flavorful, depending on your recipe. Pour the liquid over the vegetables in the jars, ensuring they are completely submerged while still maintaining the necessary headspace.
Wipe the jar rims clean, then place the sterilized lids on top and screw on the bands until fingertip tight. Process the jars in a boiling water canner or a pressure canner, following the time and pressure guidelines specified for the vegetable you're canning.
Once processed, remove the jars carefully and let them cool undisturbed for 24 hours. Check the seals, then label and store your jars in a cool, dark place. Properly canned, your vegetables can be enjoyed throughout the winter months, adding a taste of summer to your meals.
Remember, safety is paramount when canning. Always follow up-to-date, tested recipes and procedures to ensure your canned goods are safe to consume. Happy canning!
Freezing Fruits and Vegetables for Maximum Freshness
Freezing is an excellent way to preserve the flavor, nutritional value, and freshness of fruits and vegetables from your Minnesota garden. With the right approach, you can enjoy the taste of summer even in the heart of winter. Here's how to freeze your garden produce effectively.
Begin by selecting the freshest fruits and vegetables. Just like with canning, the quality of the frozen product is best when the produce is harvested at its peak of ripeness. Wash your produce thoroughly to remove any dirt, insects, or pesticides. For fruits, you might consider adding a little lemon juice to prevent browning.
Blanching is the next crucial step for most vegetables and some fruits. This process involves briefly boiling the produce and then plunging it into ice water. Blanching stops enzyme actions which can cause loss of flavor, color, and texture. The blanching time varies depending on the vegetable or fruit, so be sure to look up specific guidelines. Remember, blanching is not necessary for all produce, like berries, which can be frozen directly after washing.
After blanching, dry your produce completely. Any excess moisture can lead to freezer burn or ice crystals, affecting the quality of your frozen goods. Once dry, spread your fruits or vegetables on a baking sheet in a single layer and freeze them until solid. This step, often referred to as 'flash freezing,' helps prevent the produce from sticking together, making it easier to use in portions later.
Once frozen, transfer your produce to airtight containers or freezer bags. Removing as much air as possible will further protect against freezer burn. Label each container or bag with the date and contents. Properly packaged, your fruits and vegetables can last for several months in the freezer, retaining most of their flavor and nutritional value.
Freezing not only extends the life of your garden bounty but also offers convenience. Frozen produce can be quickly added to smoothies, soups, stir-fries, and baked goods. As you plan your garden layout and decide on which vegetables to grow, consider including varieties known for freezing well, such as berries, beans, and peas, to maximize your garden's year-round potential.
Remember, while freezing can preserve the quality of your produce, it's essential to follow proper safety guidelines and consume frozen goods within a recommended time frame to enjoy the best taste and nutritional benefits. Happy gardening and preserving!
Drying Herbs and Making Herb Infusions
Drying herbs and creating herb infusions are timeless techniques that allow you to enjoy the flavors of your Minnesota garden year-round. These methods not only preserve the taste and nutritional benefits of your herbs but also open up a new world of culinary and medicinal uses. Here's how you can get started.
Begin by harvesting your herbs. The best time to do this is in the morning after the dew has evaporated but before the sun becomes too intense. This helps ensure that your herbs are at their peak in terms of essential oils, which equate to flavor and aroma. If you've followed essential tips for starting your Minnesota garden, you'll have a variety of herbs ready for drying.
To dry your herbs, you can use several methods. Air drying is the simplest and involves tying small bunches of herbs together and hanging them upside down in a warm, airy, and dark place. Another method is using a dehydrator, which is more consistent and quicker. Spread the herbs on the dehydrator trays and follow the manufacturer’s instructions. Whichever method you choose, ensure your herbs are completely dry to prevent mold.
Once dried, store your herbs in airtight containers away from light and heat to maintain their potency. Dried herbs can be used in cooking, to make teas, or even as part of your home apothecary.
Making herb infusions is another wonderful way to preserve the essence of your garden. Herb-infused oils, vinegars, and honeys can add a delightful flavor to dishes and make beautiful handmade gifts. To create an infusion, simply add your dried herbs to a carrier oil, vinegar, or honey, and let the mixture sit in a cool, dark place for several weeks. Strain away the solids, and what remains is an infused product that carries the essence of your garden herbs.
Whether you're interested in exploring herb gardening in Minnesota or looking for ways to enhance your culinary creations, drying herbs and making herb infusions are techniques that can expand your gardening and cooking repertoire. Remember, these preserved goods also make excellent gifts, sharing the bounty and flavors of your garden with friends and family.
Root Cellaring: The Traditional Storage Method
Root cellaring is a time-honored technique that dates back to before refrigeration, allowing gardeners to store their produce in a natural, cool environment throughout the winter months. This method is perfect for many root vegetables, such as carrots, beets, and potatoes, as well as other hardy vegetables like cabbage and winter squash. The essence of root cellaring lies in its simplicity and the minimal energy it requires to maintain.
Choosing the right location for your root cellar is crucial. An ideal cellar should be cool (between 32°F and 40°F), dark, and moderately humid (85-95% humidity) to prevent the produce from drying out. Basements, crawl spaces, and even insulated outdoor pits can serve as effective cellars. For those looking to incorporate this method into their gardening and storage practices, understanding the basics of starting your Minnesota garden can significantly enhance the variety and volume of vegetables suitable for cellaring.
Preparing your produce for storage is another vital step. Only store produce that is undamaged and disease-free to avoid spoiling the batch. Once harvested, certain vegetables like carrots and beets can be lightly cleaned but should not be washed as moisture can lead to rot. Layering your produce in straw or sawdust can also help regulate moisture and prevent spoilage.
Monitoring your root cellar throughout the winter is essential. Regular checks can help you remove any produce that begins to spoil, preventing it from affecting the rest. This traditional method not only extends the shelf life of your garden’s bounty but also enriches your meals with home-grown produce during the colder months, embodying the true spirit of self-sufficiency and sustainability.
For gardeners interested in maximizing their yield and storage capabilities, employing techniques like companion planting can ensure a diverse and plentiful harvest, perfect for root cellaring. Additionally, attracting pollinators can boost your garden's productivity, providing more produce for preservation.
Root cellaring, with its low-tech appeal, is a testament to the ingenious ways our ancestors preserved their harvest. It encourages modern gardeners to look back to traditional methods for inspiration, proving that sometimes, the old ways can offer surprisingly effective solutions for today’s gardening challenges.
Creative Uses for Your Preserved Goods
Once you've mastered the art of preserving your Minnesota garden's harvest, the next exciting step is finding creative uses for your preserved goods. The beauty of preserved fruits, vegetables, herbs, and other garden delights is that they can be transformed into a myriad of culinary creations, adding depth and flavor to your winter meals.
For starters, consider the simple pleasure of incorporating canned tomatoes into a hearty stew or homemade pasta sauce. These preserved tomatoes can also serve as the base for a vibrant vegetable garden soup, blending flavors from your summer garden into a warm winter's meal.
Freezing offers another avenue for culinary exploration. Imagine the summer sweetness of frozen berries in a homemade pie or as a topping for pancakes on a snowy morning. Frozen vegetables like green beans and peas are perfect for stir-fries or as sides to a cozy roast dinner. For those who planned their spring garden layout for maximum yield, the frozen bounty can be a testament to your foresight and planning.
Dried herbs and herb infusions bring a touch of summer to your kitchen year-round. Create your own seasoning mixes from dried herbs to elevate any dish. Herb-infused oils and vinegars can be used in dressings, marinades, or as gifts, sharing the bounty of your herb garden with friends and family. The possibilities are as vast as your imagination.
Root cellared vegetables like carrots and potatoes can be the stars of winter roasts, soups, and stews. Their earthy flavors ground us in the colder months, reminding us of the cycles of growth and renewal. Utilizing these in recipes that call for hearty vegetables can bring a sense of satisfaction that only comes from eating food you've grown and stored yourself.
Lastly, your preserved goods can be wonderful components in your holiday meals or as unique, homemade gifts. Offering a jar of jam, pickles, or a beautifully labeled bottle of herb-infused vinegar can be a personal and heartfelt way to share the joys of gardening with loved ones.
As you delve into these creative uses, remember that the essence of preserving is not just to extend the shelf-life of your garden's produce but also to inspire creativity in your culinary endeavors. Let each preserved item be a spark for experimentation and a celebration of your garden's bounty.
Safety Tips for Home Preserving
While preserving the bounty of your Minnesota garden offers a delicious and economically savvy way to enjoy the fruits of your labor year-round, safety should always be your top priority. Adhering to safety guidelines ensures that your preserved goods are not only tasty but also safe to consume. Here are essential safety tips to keep in mind as you embark on your home preserving journey.
First and foremost, always use recipes and techniques from reliable sources. Preserving food is a science, and it’s vital to follow tested methods to prevent the growth of harmful bacteria, including botulism. Resources like the National Center for Home Food Preservation offer a wealth of information and guidelines that are scientifically verified.
When canning, pay close attention to the acidity levels of the food you're preserving. High-acid foods like tomatoes and fruits are generally safer to can in a water bath canner, while low-acid foods such as vegetables and meats require the use of a pressure canner to reach the temperatures necessary to kill harmful bacteria.
Proper sterilization of jars and equipment is non-negotiable. Before using, all canning jars, lids, and bands should be washed in hot soapy water and then boiled to sterilize. This is crucial in preventing contamination and ensuring the long-term safety of your preserved goods.
Equally important is to inspect your preserved goods before consumption. Look for signs of spoilage such as bulging lids, off-odors, or any visible mold. If in doubt, throw it out. It’s better to err on the side of caution than risk food poisoning.
When freezing, ensure that your produce is properly prepared and packaged to prevent freezer burn and to retain nutritional value. Use freezer-safe containers and remove as much air as possible before sealing to maintain the quality of your frozen goods.
Lastly, when employing traditional methods like root cellaring, ensure that your storage area is cool, dark, and properly ventilated to prevent the growth of mold and mildew. Regularly check stored produce and remove any that is beginning to spoil to protect the rest.
By following these safety tips and employing essential tips for starting your Minnesota garden, you can enjoy the flavors of your garden throughout the winter months with peace of mind. Happy preserving!
Conclusion: Enjoying Your Garden's Bounty All Year
As the final leaves fall and the frost settles in, the efforts of your summer gardening begin to find their place not just in your pantry but in the very fabric of your daily life. Preserving your harvest is more than just an act of conservation; it's a celebration of the cycle of seasons, a testament to the fruits of your labor, and a way to weave the essence of summer into the heart of winter. With jars of colorful preserves, bags of frozen fruits and vegetables, and cellars stocked with root crops, your garden continues to nourish you, bringing warmth and joy to your table no matter the weather outside.
Each method of preservation, from canning to freezing, drying, and root cellaring, brings its own unique flavors and benefits. These practices connect us to generations past and to the very essence of homesteading, reminding us of the resilience and resourcefulness required to thrive through the seasons.
But the joy of preserving your garden's bounty doesn't end with the last jar sealed. Winter offers a time for reflection and planning. As you savor the flavors of your preserved goods, consider visiting essential tips for starting your Minnesota garden to inspire next year's planting. The cold months provide a perfect backdrop for dreaming up new garden layouts, researching potential additions to your plant family, and devising strategies to enhance the next year's yield. This cycle of growth, harvest, preservation, and planning forms the core of a sustainable gardening practice, enriching not just our tables, but our lives.
So as we embrace the quiet of winter, let's carry with us the knowledge that the seeds of tomorrow's gardens lie in the successes and lessons of today's endeavors. May your pantry be full, your spirits high, and your plans for the coming season filled with the promise of abundance. Here's to enjoying your garden's bounty all year round, to the joy of sharing it with those we love, and to the continuous cycle of growth and renewal that gardening brings into our lives.